Last year, when our district decided to roll out one Next Generation “mini” unit per grade level for K-5, we decided to design the mini units ourselves. We figured, how hard could it be? We were already teaching a lot of the content, we could “next gen” what we were basically already doing by adding models, introducing phenomena, and adding some strong questioning techniques. In some ways, it’s been easier than we thought, but in many ways, a lot harder.
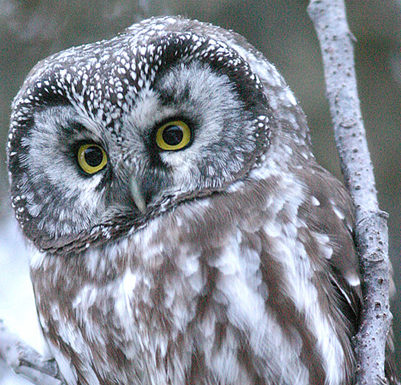
One of the toughest things was adjusting to the idea that we’d no longer be dedicating whole units to the study of particular animals. For example, when we built our grade 4 unit on internal and external structures, we figured we could keep one of our favorite grade 4 activities, dissecting owl pellets, as part of the new unit. After all, the parts of the owl’s external structure (eyes, feathers, talons, etc) and internal structure (digestive system) that we would be studying all support the animal’s survival, growth, and behavior. We’d continue to use zSpace virtual technology to investigate the owl’s internal structure, with literature and non-fiction resources to explore the external structure. The phenomenon was the owl pellet – how cool! Easy. We’d done it before.
As it turned out, using an animal we’d already taught made things both easy and hard. We’d done it before, but in many ways making significant changes to something we’d already done with different goals, was harder than starting from scratch. We used to refer to this section of our curriculum as the “owl pellet” unit. Our old assessments contained specific questions about owls and owl pellets. Keeping these great activities and resources made it difficult for us to let go of the idea of an “owl pellet unit” and embrace the idea of an “Internal Structures and Functions” unit where the owl pellet would simply be the phenomenon that allowed the students access to the core concepts of structure and function. No longer could we expect our students to simply become experts on owls – we needed them to become thinkers and investigators who would be able to generalize from their study of owls to structure and function of all animals. That’s a big leap, and in our first year, we didn’t completely make it.
Later in the unit, while introducing structure and function of plants, we encountered a very different challenge. We’d decided to introduce a plant we never had our 4th graders examine before – moss. It seemed like a good choice – there was lots of it available outside, and we could peel it right up and bring it into the classrooms when we were ready. And, we’d be investigating something new. There was only one glitch – it snowed right before this section of the unit, and the snow lasted! This little miscalculation set us back a week!
Ultimately, did we succeed with our first try at a next-generation science unit? In some ways yes – for example, the students got comfortable with the idea of drawing models, and the thinking expressed in the student models definitely got deeper as the unit progressed. The students loved the unit. How awesome is it to have students so excited and interested in their work each day? As elementary teachers, that is the best part of our job. But – do our students now have a better understanding of generalized structure and function in animals and plants? I’m not sure. In the end, they knew a lot about owls and moss, which was not the goal. But, we’re learning! We may have had mixed results this time, but we’re still evaluating and thinking about changes for next year.
The first of the year always tends to give my kids anxiety and feeling of abandonment. The next six weeks they will lose their parent. My precious Dorothy (5) and adorable Jame (3) will only see me on FaceTime for bedtime and a quick 5 minutes in the morning when they wake up as I am going out the door. This is due to the oath I took as well as thousands of others globally to be a FIRST robotics mentor. January 6th the Saturday that begins the 6 weeks of build season. For those of you that are unaware, this day Globally at about 10 am EST we learn our fate and the game of the year. In this cas, I am lucky that I live in the same time zone as where the game is released. Broadcasted out from the main kickoff event in New Hampshire Dean Kamen and Woodie Flowers send their message and homework to the world. Then the problem solving, game strategies, and money for supplies starts flowing. Here is the link to this years game.
There has been plenty of preparation gone into the year before the kick-off. Teams have been training new members and fundraising. Plenty of fundraising is required to build these elaborate robots. Our team tries to include local businesses and to help sponsor and mentor our team. What is great about this, is that our students go out and have to talk and convince the sponsors how great this program and why they need to support us. Also, students show up not knowing the difference between a wrench and a hammer. So the leadership of the program is charged with training the new members on the equipment and start building the family. Robotics becomes more than a program to the kids. It becomes family. Our team motto has become “relationships forged with aluminum but built for life” This has become more evident to me as I just went to a wedding of one of our alumni. As I saw her cake with FIRST symbols and binary code, and sitting at the robotics table, I knew I was apart of something bigger than I. Each one of the alumni had a masters in engineering, programming, and heading into Medical School.
Now for this years game. This year we need to stack milk crates “power cubes” onto a balance beam that is either about 2 feet or 5 feet off the ground. As long as the balance is tilted to our team we are building points. Then at the end of the game we can opt to climb a 7 foot high bar for 30 points. The moment we find out our task the students start to problem solve and design. They prototype and do research. They have found out that a previous robot that we built while these students were in elementary school. Was able to stack crates with ease. So they savagely recycled her. So now have a robot in the works. Making better what we used in the past. Also the climbing task was very similar to another robot we built when these students were in Pre-k. They are currently adapting the plans to meet this years needs. Students are actively working each day doing things that they can not do anywhere else.
The way the build works is that student leadership is charged with different teams and the leadership is not supposed to touch tools but to assist the younger members staying on task and the leadership reports to mentors. This is what every team should be doing. Using the adults as a reference but the robots should be built completely by students. Student ideas should be examined experimented and tested. Although some of the robots do not look student built at all. I get some joy in seeing the finished product and the pride of my team each year.
The FIRST program is a program that get the students heads out of their phones and gaming systems and takes textbook knowledge and puts it to real use. Get the students to make something real and tangible. Gives them the ability to fail, fall down, and pick themselves up to succeed. Any student that does not have an idea fail doesn’t learn anything. It is not uncommon to see a student break down when something they worked hard for fail, but you see them get the determination to adapt and change their idea. These are the success stories. They own their creation. Often their creation becomes their child. When the students develop this adaptation and creativity you see it in the pits of the competition. That is a sight to see. The team converge on their bot during competition and fix things that broke or tweek their design to make their bot better mid competition. My job is to support them and the students make it happen. They are learning to depend on themselves and their team. They are learning that life is not about memorizing what someone told them, they are learning life does not have an instruction manual. They are learning that they need to critically think and whatever they put their mind to they can accomplish.
The team is not just about building robots. Team 2161 is also about helping others. In the past 12 years or so They have raised over $200,000 for St. Baldricks to help fund research on childhood cancers. They put the whole event together and team alumni come back to shave the way to a cure. Please consider donating or coming.
As my children Dori and James lose a parent for six weeks. In the end when they come to competition they see their extended family the robotics team. As my kids come up to the school to support my events , the students get to know them and the students will have them control a robot and show them what their parent has been up to. James also has been shaving his head since he was one year old. My students expect my kids to be at competition too. So each year the family grows. The stress and anxiety continues but in the end a better society can be formed with the critically thinking students that realize that they hold the key to greatness. I leave you with these two quotes from Nicola Tesla “Today’s scientists have substituted mathematics for experiments, and they wander off through equation after equation, and eventually build a structure which has no relation to reality.” “I do not think there is any thrill that can go through the human heart like that felt by the inventor as he sees some creation of the brain unfolding to success… such emotions make a man forget food, sleep, friends, love, everything.”
The Faulkes project is a real-time, astronomy based research and imaging project based at Cardiff University in England, and Santa Barbara, California. The later operates as LCOGT (Las Cumbres Observatory Global Telescope Network), and is an equal partner in the project. Through this project, students can use large research grade telescopes located in Hawaii and Australia, via the internet, to image objects and conduct student research. In addition, LCGOT has created a network of smaller 1-meter telescopes around the world.
I became involved in the Faulkes project during the summer of 2010, after trying to build an observatory in Montauk for 7 years. It was my initial goal for the local observatory, to operate from a network, providing High Schools internet access to the telescope. When I found out about the already established Faulkes project, I passed the torch and began earnestly using the Faulkes telescopes on theLCGOT network. The telescopes in Hawaii and Siding Springs, Australia, are two-meter diameter telescopes which cost 30 million dollars each. These are capable instruments, to say the least.
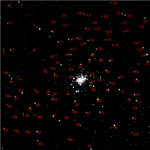
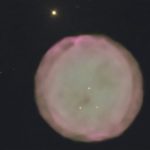
Since joining the program, Montauk science students have imaged a planetary nebula (M97), and a pair of galaxies that are colliding (NGC 4567) and many other deep space objects. Montauk students have worked on rebuilding a galaxy catalog called the Hickson Compact Galaxy catalog. In addition, several students began research on determining which stars in a globular cluster are classified as Be Stars.
As an example of a student’s actual research (sponsored by researchers at Cardiff University), the student numbered image below is named NGC 330. The student used photometry to determine any variation in the amount of energy being emitted by stars in this field and compared multiple images taken over several months. The student then examined the images in specific frequencies of light and used various mathematical functions to determine which stars are classified as B[e] stars.
For general classes, teaching students about astrophotography using robotic instruments and photo-processing can be challenging enough, and very rewarding. The following images were taken and processed by Montauk students. Most science students get very excited about participating in this project, and this can be a terrific STEM project as well.
I’m bored with talking about success. By any metric, I’ve had the good fortune to enjoy a lot of success in my career as an educator. But I also fail a lot. And I know that I’m not alone. Failure is a significant part of educating kids. I don’t mean kids failing (hopefully that’s pretty diminished), I mean teachers failing to do the things they try to do. Things not working as planned. Mistakes being made. This kind of failure is more than just a thing that happens sometimes, it’s a significant part of the job. And it’s totally normal and expected.
So why do we hide it?
If you look at any public collection of educators, you’ll quickly see that discussion of success is much more common than conversations about failure. Any look at the #eduTwitter-scape or any of the Facebook groups for teachers is basically a wall-to-wall display of success. Kids doing amazing work. Teachers trying new things, and being delighted with the results. Everything working out exactly as planned (or even better than that). Which is lovely, but as far as I’m concerned, it’s not particularly reflective of the reality of teaching. Teaching is hard creative work, and like all hard creative work, people fail a lot.
The issue is even more glaring in science education, where teachers teach a field of endeavor that proceeds by failing. The central role of falsification in the scientific process is so essential that only presenting success not only warps perceptions of reality; it can distort our very understanding of it. And yet, we still pretend like things succeed in our classes more than they fail.
It’s easy to understand why this is the case. Generally speaking, people want to be perceived at their best, and for most people, their “best” is not when things they are trying to do aren’t working. It takes a degree of confidence to be willing to show one’s posterior on a regular basis. But in my experience, giving failure a public perch leads to a level of improvement in practice and product that is just not possible if all you talk about is success. Learning is nothing if not all about correction.
Assuming you agree with the above, the question becomes how to build a place for failure in your public life. I won’t pretend to have all of the answers, but I do have a few ideas that have worked well for me:
Keep everything in Beta. Beta testing refers to the practice in technology development wherein a working, imperfect, version of a product is turned over to a large group of people to use. This everyday usage then provides the developers with a list of imperfections that would otherwise remain undiscovered if the developers were the only ones doing the product-testing. This philosophy is easily applied to education. The work that teachers do and the materials they create should live in a state of constant beta testing. By taking the default stance that work is imperfect, there is less discomfort when the imperfections in that work are discovered. Of course, this type of thinking is only helped by a willingness to make your work available to a vast professional learning network under pretty open terms of usage. Fortunately, in the modern era of easy-to-build webspace and free to distribute licensing, it’s trivial to set up a system wherein you can be a perennial beta tester. All it requires is a willingness to do it.
Keep a Resume of Failures. I first discovered the concept of the resume of failures when I read this article. The example resumes that it included lead me to put up my own. I think more people should do this, and I hope that doing so on my end leads some of the tens of thousands of people who interact with myself and my digital footprint every year to realize that failing is a large part of why I’ve had the career that I’ve had. Who I am as an educator, and what I do is arguably much more a result of the failures that I’ve had in my career than it is of my successes1.
Reflect on failures (and successes). I am a huge fan of reflective practice. My reflection tends to happen in public spaces. I find a lot of value in thinking aloud if for no other reason than that it invites correctives from a maximal number of wise minds. But even if a public airing of your reflective practice isn’t something that appeals to you, the act of reflecting itself is invaluable for learning from your experiences. There are a variety of tools that you can use to help you reflect, ranging from a notebook, a simple .txt file, or something a little more formal like 750Words or a blog. However you do it, the trick is to make sure that you actually stick to a routine of regularly engaging in reflection on the work that you are doing with the understanding that the purpose of that reflection is not to whinge about imperfection, but instead to think about how to improve.
These are three relatively easy ways to build a space for considering failure into your professional life. As always, it might be too much to try to do all three of the above at the same time. But the point isn’t to do everything that’s suggested (or even anything that’s suggested). Instead, it’s to work to make a space in your working life for acknowledging that however good we are as educators, however fortunate we have been in our work, we still fail a lot.
When we think of phenomena, we usually think of things that are big and dramatic, hence the expression, “that’s phenomenal!” The biggest science phenomenon of the summer may have been the solar eclipse – huge and spectacular (unless you watched it from Long Island, in which case it may have felt like a bit of a tease). The devastating hurricanes that came at the end of summer are also awe-inspiring (although devastating) phenomena.
But “phenomena” has a broader meaning. In Next Generation science, a phenomenon doesn’t have to be big –it can be anything that sparks curiosity and makes us want to know more. A tiny ant carrying a larger insect, a drop of water clinging to a leaf, a magnified grain of sand are all phenomena that can be used to introduce science units because, more than anything, they can inspire us to ask questions like: What is this? What is happening? How does that happen? Can we change what is going on? In Next Generation science, phenomena may or may not awe and amaze us, but they always make us wonder.
As elementary teachers we know all about getting kids to wonder – it’s a key part of our job. Now, as we begin to introduce Next Generation units, we’ll be thinking very deliberately about phenomena that can anchor units as well as phenomena that can introduce particular lessons within those units. The key is to choose phenomena that will get the students wondering, questioning, and lead us into investigations that allow them to discover core science concepts and make connections across disciplines.
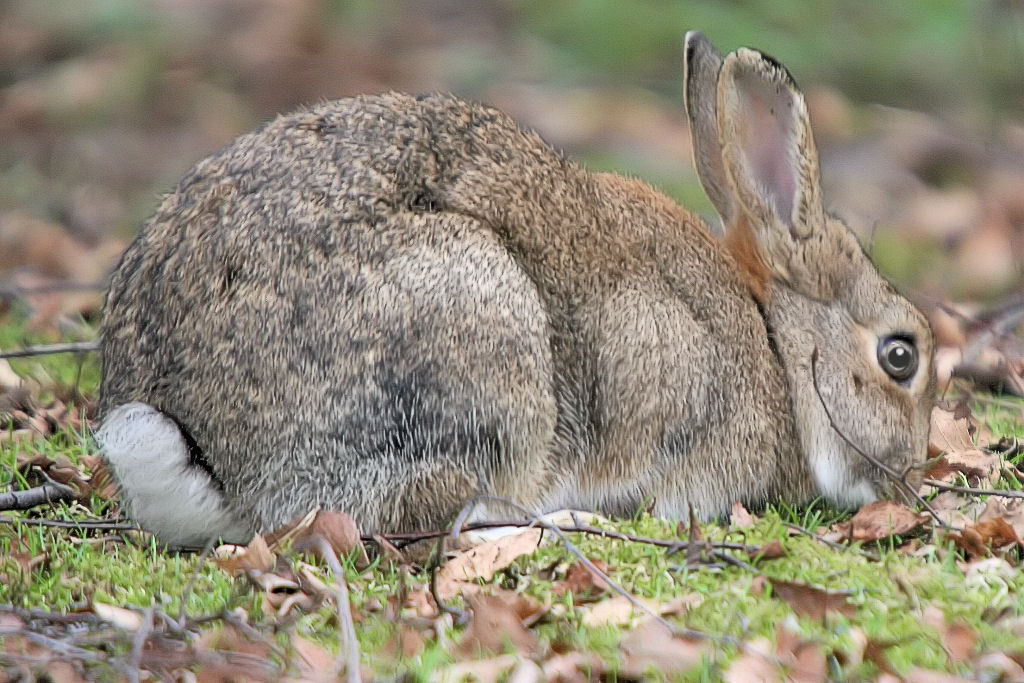
Phenomena can be introduced as photographs, videos, demonstrations, sensory experiences; but the best may be those we bring students outside to directly observe. For example: Rabbits are everywhere this fall. Take young students outside to observe them! Then show a photograph that highlights the ears. This will generate lots of questions: Why do they have such big ears? Do they hear better with those ears? What if their ears were not so big? This can be an excellent way to induce a grade 1 unit on sound, or a grade 4 unit on external structures of animals. After the rain, take young students out to see earthworms on the pavement. Then do some digging and observe them in the soil. This will generate lots of questions: Why do they come up from the ground when it rains? Will they die on the pavement? Will they drown in the water? How do they move in the soil? This can be a way to introduce a grade 3 unit on environment and survival, grade K unit on push and pull.
Getting outside provides us with an endless source of phenomena to grab student interest, generate excitement and elicit the kinds of questions we need in order to build understanding as our youngest students discover for themselves the amazing way our world works.
Over the years I have realized that there is more to teaching science than just sitting in a classroom. We should live it. The environment of Long Island has so much to offer. There is something for each one of our disciplines, and all we have to do is look to our waters. As a Professional Association of Diving Instructor (PADI) Dive instructor, I have been teaching students about the wonders of diving. Being an AP Physics 2, Physics, Chemistry, and Living Environment teacher brings so much more to this activity.
My uncle Billy was an avid scuba diver. I remember him telling me stories of all his diving adventures from around Long Island. Because of him, I joined the diving club, Aquanuts, at the Hampton Dive Shop. There I learned about so many other possible diving adventures to go on locally. Often people think that scuba diving off of Long Island isn’t very good because visibility isn’t very good, but I learned that when you know where and when to dive there is so much to see and do.
As a first year AP Physics 2 teacher a lot of things dawned on me. The unit I teach on fluids in AP physics 2 includes everything I teach in my “open water diver” and specialties of diving classes. Once this realization hit me, I started applying many of the concepts of diving to AP physics 2. Many of the demonstrations and discovery activities I use in the classroom where inspired by diving. For example, my students calculate the amount of air required to generate buoyant force to lift things off the floor, they calculate the volume of a sealed bottle at different depths, and the students develop ideas about air consumption at depths. Because of this, all summer I have been trying to develop labs where students can go on a field trip to the Dive Shop to test and discover these principles. I want the students to learn from real life action in the pool. I want the students to model the phenomena and discover and explain what is happening.
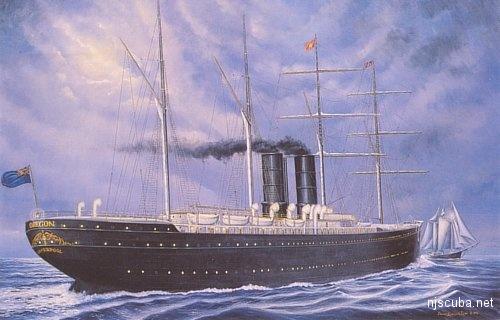
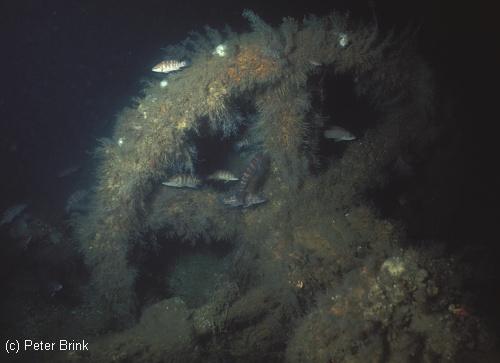
Educators should explore their curiosity and try something new. Find a dive shop and experience what you teach. The more you experience the better you will become as an educator. For example last year I dove the Oregon wreck. On March 14, 1886, the Oregon collided with another ship and sank to the bottom of around 100-foot depth just off the coast of Fire Island. She was the fastest ship of her day using sails and steam engine. Before the dive, I was told that all that was left was a three story high steam engine and boilers. I did not think there would be much to see. During my plunge into the Atlantic, the steam engine came into sight in all of her majesty. Then I spent the next 3o minutes or so lost in all of the biology and wonders hidden in all of the nooks and crannies. I was getting lost in the science and thinking of the history and people who were on that ship that fateful day.
Another dive was of the USS San Diego. On July 19, 1918, the Sand Diego was sunk by German Submarine U- 156 just south of Fire Island and was the only major ship lost during WW1. She sits upside down on a sandy bottom at about 100-foot depth. The dive was awesome and visibility was about 40 feet. This ship has been underwater for about a 100 years and my curiosity got the best of me once again. The holes that Mother Nature put in her gave me great areas to look inside and see the life of that now calls her home.
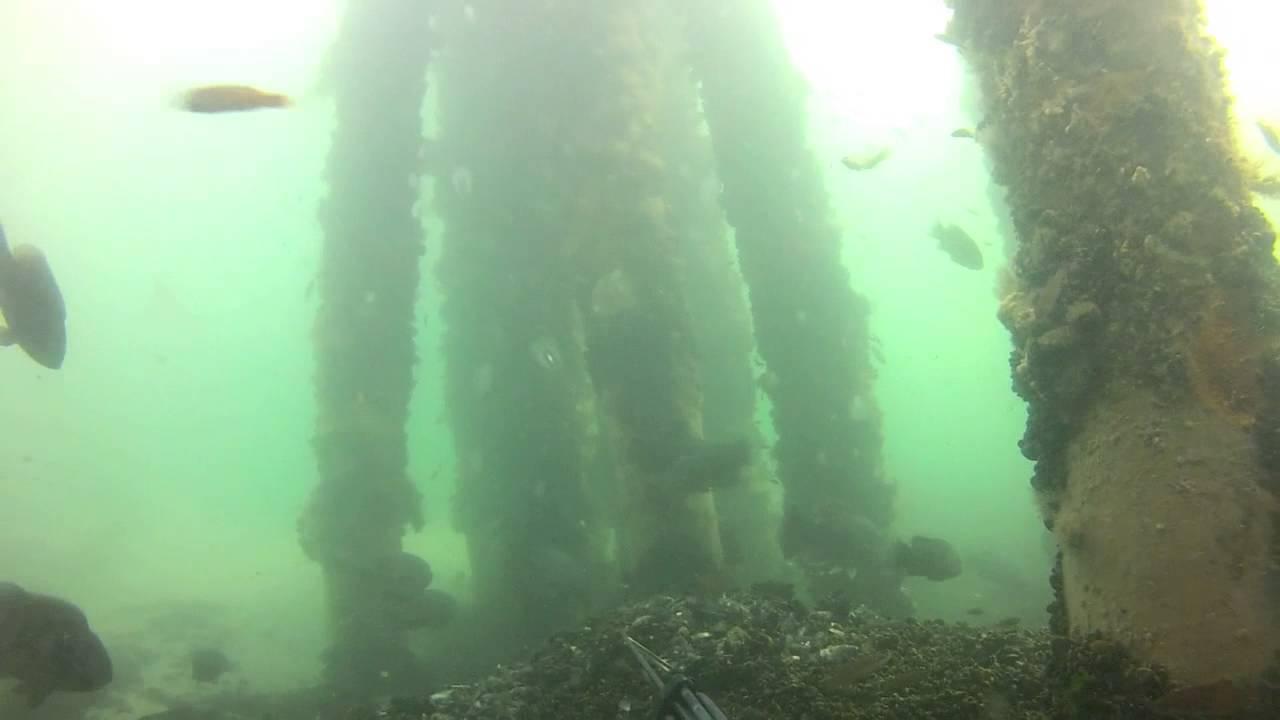
Wrecks are not the only things to see locally when diving. The Ponqugue Bridge provides a beach dive that offers so much ecology and goes a max of 30-foot depth. Right at Shinnecock inlet, you can spend 40 minutes underwater and your wonder and amazement will grow. Just to see how all of the creatures interact and how they hide and even the human impact of the environment and the symbiotic relationship that exist between humans and sea life. The two bridges offer a home to the sea life. They are attracted there for the food source and protection they offer. Including the utility cable that lies on the floor of the canal. You will find more and more hiding places for sea life. The more I dive the site the more I find.
Some of the fun is investigating the areas that you are going to explore. There is so much history just sitting there on the sea floor. I try to learn about the history before I dive the location. I do this to pre plan my activity for safety, but also to learn where a ship had been, what people were on that ship and how that ship came to meet the sea floor. If I did not dive our local stores I would never know of the German Submarines, artificial reefs and other ships that went down for various reasons. It is so interesting to learn about the history and to compare the original diagrams of the ship to what they look like now.
What I am trying to say is that it’s great to venture out of the classroom not just in field trips but rejuvenate our love of the subject. Try something new each summer vacation to get out of your comfort zone to feel more alive. The more you learn and experience and the more ways you will have to provide the information to the students. For more information please email me and if you have any ideas for labs you would like to see developed. Also if you would like to set up an experience or get your certification please let me know.
This past week, STANYS and the New York State Master Teacher Program co-sponsored professional development workshops in three regions in New York State. The first of its kind model, allowed for teachers from across the state to experience the same two-day workshop. The consistency of the professional development was helpful as New York teachers came together to start to build a collection of lessons and ideas using a common understanding and template. Key to any professional development is the quality of the presenter. Luckily, for New York, Paul Andersen, who has created countless videos on the Next Generation Science Standards (NGSS) and has led teacher training sessions all over the world was on hand to provide a deeper dive into New York State Science Learning Standards (NYSSLS).
The workshop began with “The Wonder Tube”. During this exercise, teachers wore their “student hats” to experience firsthand modeling instruction from the other side of the desk. Teachers were provided with a demonstration of the Wonder Tube and individually developed a model for what they perceived to be the mechanism by the which the tube functioned. Key to utilizing phenomena such as this is that students are not able to google the answer and find out how it works. Participants individually drew what they believed the model to be, followed by group questioning of each individual’s model to understand what that person was thinking when they made that model. Teachers had a hard time with this task, wanting to state what they thought was happening. The pedagogical shift calls for group members to come to a consensus through the constant questioning of individual group members regarding their model, with no one group member simply telling “the answer”. Models were presented, and the audience was given the opportunity to ask questions. Amazingly, no two models were the same. Paul asked the entire group to find similarities and differences within the models. Modeling instruction is one vehicle by which teachers can begin to incorporate science practices into our classrooms. For more support with modeling, the American Modeling Teachers Association runs workshops to assist teachers.
Another teaching tool introduced by Paul called Question Formulation Technique calls for students to generate a list of questions surrounding an observable event; a phenomena. To do this participants observed termites following black lines that created the pattern of Olympic rings. Participants then brainstormed as many questions they could about the regarding the behavior of the termites they had just witnessed for five minutes. This was followed by labeling the questions as open or closed and determining which open ended question the group should investigate. The technique is easily applicable to teachers who would would like to try a NYSSLS aligned student driven inquiry approach.
Another means of rolling out NYSSLS to the participants was the Claim, Evidence, Reasoning (CER) framework, which focuses on the conclusion component of a laboratory report. After the students have completed the experiment, in essence collected their evidence, they are ready to make a claim. The teachers had the opportunity to experience this framework by investigating the question: “Are skew dice fair?” Groups then created large posters with their claim as well as a display of the supporting evidence via words, tables and graphs, followed by the reasoning which included scientific principles surrounding the experiment. Posters were stuck to the wall and shared with others through a gallery walk and critique with post-its by other groups. Paul also provided his inquiry lab format as a resource to assist teachers in NYSSLS implementation via CER. This starts with an explanatory model, students then sort the variables in order of importance, after which comes data collection, a graphical representation and then the exercise concludes with the CER framework.
When starting the workshop, Paul asked for what the teachers wanted to get out of the professional development and on the second day, he came back to address the topics that were of greatest interest to the attendees. One such NYSSLS concern was how to incorporate engineering design in your classroom by first defining criteria, followed by developing a solution and then refinement of that solution. Anderson suggested an activity that gave the participants the task to make a tower as tall as possible with only two pieces of computer paper, 10 cm of tape and five minutes. All participants were engaged as the clock displayed in the front of the room counted down the time. All groups frantically rushed and at the end Paul claimed that was just the prototype and now participants were given the same task after observing what other groups had done to engineer the actual tallest tower. The activity could be utilized in any STEM classroom and adapted to a variety of tasks.
Teachers are eager to learn about what assessments will look like with the new standards. There are a variety of resources available to help teachers get started. Paul recommends starting by printing out cards with practices and crosscutting concepts to help generate ideas for student assessments. On the second day of the workshop, teachers of the same content area worked to create an assessment aligned to one specific performance expectation. By laying out the cards on the table, teachers were able to unpack the the practices and cross-cutting idea that could be used to assess the particular disciplinary core idea. Large posters of assessments were created and hung on the walls. Groups then gallery walked and gave feedback with post-its to improve the questions which were photographed and collected in a google drive to serve as a resource as teachers present go out and turn-key aspects to their colleagues. For additional resources on assessments, Paul suggested looking into ngss.nsta.org and nextgenscienceassessment.org for NGSS bundles and storylines for example assessments.
If one thinks of the level of comfort of the new standards, there is still much growth for all parties involved. Paul discussed how the implementation of any new teaching methodologies have an initial dip prior to rise is success rate and the same should be expected as teachers start to incorporate the NYSSLS approach. The workshop concluded with groups of the same discipline creating lessons using a common template.
Are you interested in diving even deeper? Then consider joining your fellow STANYS members at our state conference this November 4th- 6th in Rochester, where teachers will have the opportunity to learn more through a more extended content specific teacher institutes. Additionally, on the Monday of the conference, Paul Andersen is slotted to provide further workshops on NYSSLS. If you are unable to travel to Rochester please consider attending the Suffolk STANYS Fall Conference, which will be held on October 16th at Hofstra University where there will be more opportunities to learn about some of the NGSS best practices through modeling and questioning workshops.
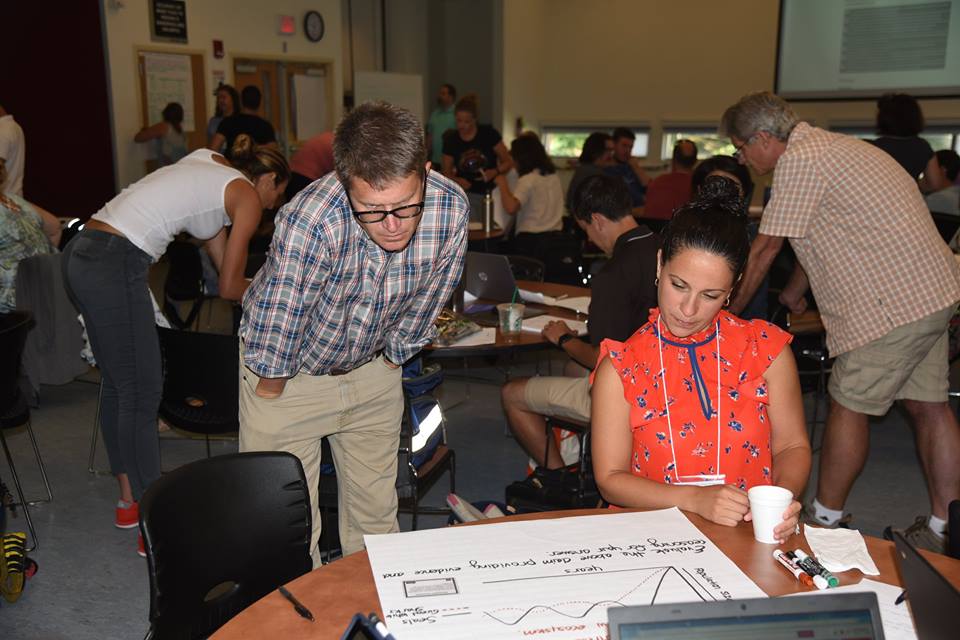
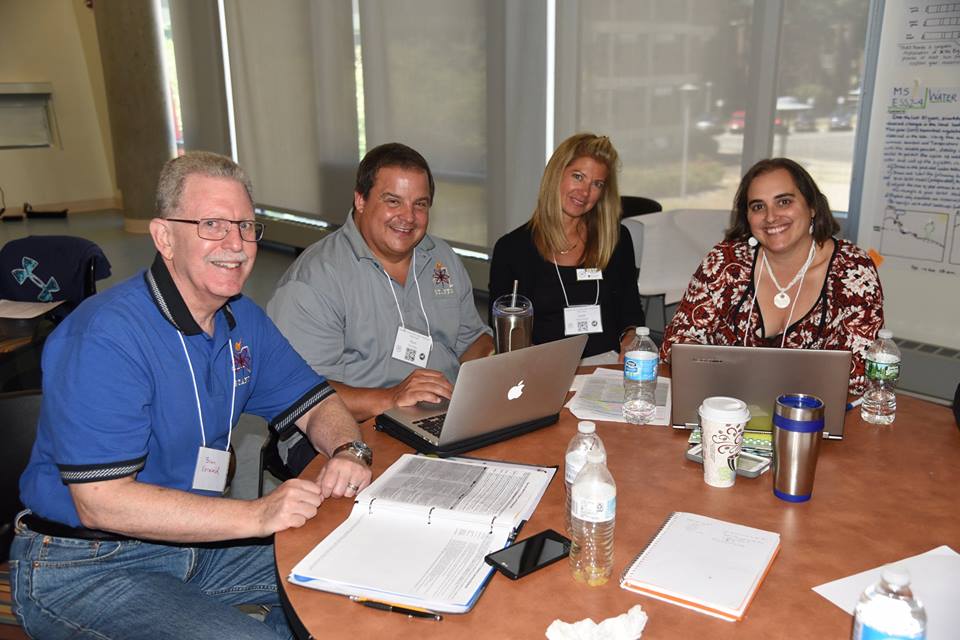
Attendees work together to create NYSSLS assessments.More attendees having an (obvious) good time!Teachers utilize Paul’s cards for science practices and crosscutting concepts to design assessments.Paul provides feedback on teacher created assessments.
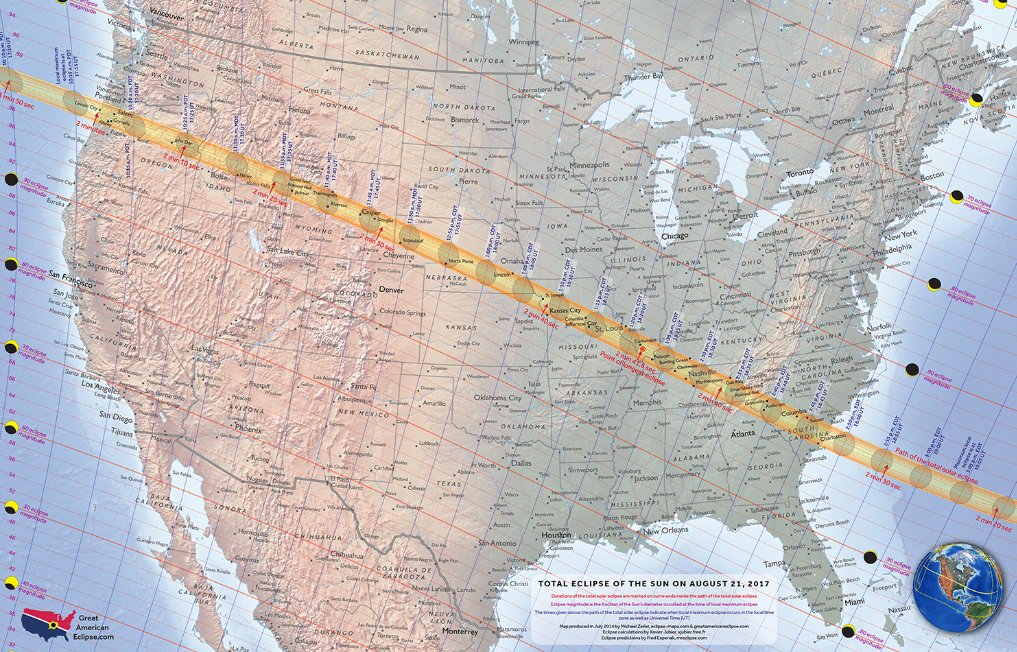
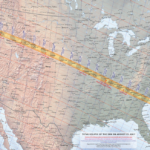
This summer’s total solar eclipse is sure not to disappoint. The eclipse will be partially visible across most of the United States, while the path of totality cuts a swath diagonally across the nation from the Pacific Northwest to the Carolina coast.
It is difficult to get the Sun, Moon and Earth to align for a total solar eclipse. The last total solar eclipse to cross a large portion of the United States was in 1979. The last annular solar eclipse to cross New York was May 10, 1994, when I was in 8th grade. That was amazing to see and since then, I have waited patiently for 2017’s totality event.
After a year of planning our eclipse trip, our path is set. On August 21, 2017, we will be in Mount Juliet, Tennessee, northeast of Nashville, nearly on the centerline of totality! There is a lot to do in the area, and when I searched for hotel rooms in late April, there were still many available.
Originally, we intended to view the eclipse from Carbondale, Illinois. A shady hotel cancelled the reservations I made a year in advance, and left us scrambling for a new location. Luckily, it is not too late to find a room, or a campsite, and see one of nature’s rare and beautiful events.
The Path of Totality for the Great American Total Solar Eclipse, August 21, 2017 from https://www.greatamericaneclipse.com/nation/
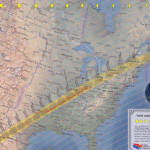
April 8, 2024 Total Solar Eclipse https://www.greatamericaneclipse.com/april-8-2024/
What if you miss the eclipse this summer?
The next American total solar eclipse will be Monday, April 8, 2024. This will take a different path from the 2017 eclipse, with the Moon’s shadow crossing over far western and northern New York State! We will have to work on our local school boards to plan our spring break that week, so we are all able to travel for the event.
On Friday, April 21, Suffolk STANYS held their annual “Spring Into STEM” conference at Brookhaven National Laboratory. Attended by over 140 science teachers from around Long Island, it is one of the premier events for science educators of all grade levels and content backgrounds. Presenters came from a variety of organizations and institutions, including the Long Island Association for Chemistry Teacher Support and the Long Island STEM Education Leadership Association. Participants had the opportunity to participate in a wide array of workshops – there was even a Makerspace!
One of the overarching themes of the conference was informing and preparing teachers about the New York State Science Learning Standards (NYSSLS). With its roots in the Next Generation Science Standards (NGSS), NYSSLS is not just a change in content; NYSSLS will change how educators teach science to their students. As a result, STANYS made sure to offer sessions in these methods such as question formulation technique, science and engineering practices, and modeling. here was even a session that discussed the possible upcoming changes to science assessments that educators could expect see.
Since this conference is held at Brookhaven National Laboratory, educators had several experiences that are unique to the lab. Teachers were able to tour the National Synchrotron Light Source II, which is currently the brightest synchrotron in the world! Additionally, Brookhaven National Laboratory’s Office of Educational Programs also offered a variety of workshops that were in the spirit of the NGSS.
One of the highlights of this conference was our feature keynote speaker Chris Paparo. Not only is he the manager of SUNY Stony Brook’s Southampton Marine Science Center’s web and the center’s resident naturalist, he is a well-respected speaker and advocate for Long Island’s natural environment. His talk, “From Plankton to Whales – Why Our Local Waters Are Worth Protecting”, captivated many of our attendees, especially since he included many of his personal photographs of Long Island. Many of his photographs, as well as his adventures with his red-tailed hawk Emmy, can be seen on his online photo gallery, Fish Guy Photos. It can be found on both Facebook and Instagram.
In closing, the conference was a success. Special thanks go out to our Vice President of Programs, Matthew Christiansen for all his hard work putting this conference together, the STANYS Suffolk Board for volunteering in assisting in this conference, and all the presenters who came together to offer a high-quality conference. We hope to see you soon at our fall conference, which will be taking place on October 16, 2017 at Hofstra University. Be on the lookout for a postcard this September with more details!
Do you want to get every awesome thing that comes this way sent to your electronic mailbox? If so, then subscribe to the site. Just type your email address of choice into the subscribe box and hit the pretty button. That’s all you have to do! Subscribers get new articles and site updates sent their way auto-magically. It’s the easiest way to play!