How Online Casinos Verify Identity: Si obtienes tres o más símbolos de peces morados y azules en los carretes, activarás 20 giros gratis y duplicarás tus ganancias con un multiplicador 2X de hasta 200,000 monedas.
Es por eso que los casinos en línea han creado sus sitios sin esfuerzo para navegar, y sus procesos son igualmente rápidos y fáciles de seguir, con la afirmación de que no hay beneficio de depósito.
Dichos casinos son seguros y están autorizados por autoridades de juego de renombre mundial.
Las promociones disponibles son relativamente ilimitadas y una sección completa del sitio está dedicada a una experiencia VIP para aquellos que buscan estar entre la élite en Genesis Casino.
When we think of phenomena, we usually think of things that are big and dramatic, hence the expression, “that’s phenomenal!” The biggest science phenomenon of the summer may have been the solar eclipse – huge and spectacular (unless you watched it from Long Island, in which case it may have felt like a bit of a tease). The devastating hurricanes that came at the end of summer are also awe-inspiring (although devastating) phenomena.
But “phenomena” has a broader meaning. In Next Generation science, a phenomenon doesn’t have to be big –it can be anything that sparks curiosity and makes us want to know more. A tiny ant carrying a larger insect, a drop of water clinging to a leaf, a magnified grain of sand are all phenomena that can be used to introduce science units because, more than anything, they can inspire us to ask questions like: What is this? What is happening? How does that happen? Can we change what is going on? In Next Generation science, phenomena may or may not awe and amaze us, but they always make us wonder.
As elementary teachers we know all about getting kids to wonder – it’s a key part of our job. Now, as we begin to introduce Next Generation units, we’ll be thinking very deliberately about phenomena that can anchor units as well as phenomena that can introduce particular lessons within those units. The key is to choose phenomena that will get the students wondering, questioning, and lead us into investigations that allow them to discover core science concepts and make connections across disciplines.
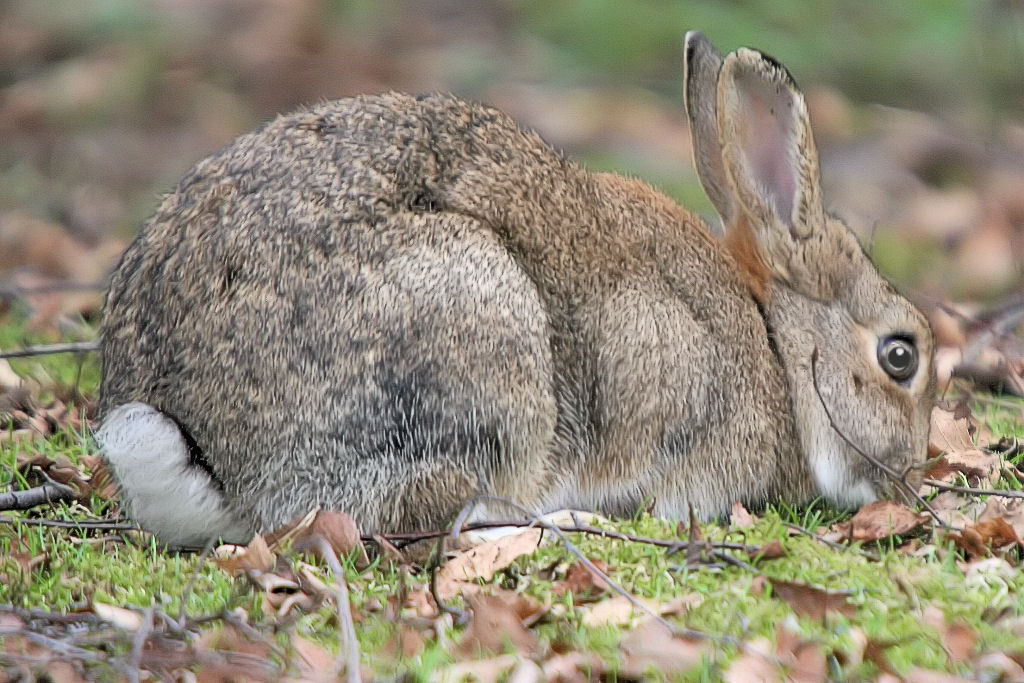
Phenomena can be introduced as photographs, videos, demonstrations, sensory experiences; but the best may be those we bring students outside to directly observe. For example: Rabbits are everywhere this fall. Take young students outside to observe them! Then show a photograph that highlights the ears. This will generate lots of questions: Why do they have such big ears? Do they hear better with those ears? What if their ears were not so big? This can be an excellent way to induce a grade 1 unit on sound, or a grade 4 unit on external structures of animals. After the rain, take young students out to see earthworms on the pavement. Then do some digging and observe them in the soil. This will generate lots of questions: Why do they come up from the ground when it rains? Will they die on the pavement? Will they drown in the water? How do they move in the soil? This can be a way to introduce a grade 3 unit on environment and survival, grade K unit on push and pull.
Getting outside provides us with an endless source of phenomena to grab student interest, generate excitement and elicit the kinds of questions we need in order to build understanding as our youngest students discover for themselves the amazing way our world works.
Over the years I have realized that there is more to teaching science than just sitting in a classroom. We should live it. The environment of Long Island has so much to offer. There is something for each one of our disciplines, and all we have to do is look to our waters. As a Professional Association of Diving Instructor (PADI) Dive instructor, I have been teaching students about the wonders of diving. Being an AP Physics 2, Physics, Chemistry, and Living Environment teacher brings so much more to this activity.
My uncle Billy was an avid scuba diver. I remember him telling me stories of all his diving adventures from around Long Island. Because of him, I joined the diving club, Aquanuts, at the Hampton Dive Shop. There I learned about so many other possible diving adventures to go on locally. Often people think that scuba diving off of Long Island isn’t very good because visibility isn’t very good, but I learned that when you know where and when to dive there is so much to see and do.
As a first year AP Physics 2 teacher a lot of things dawned on me. The unit I teach on fluids in AP physics 2 includes everything I teach in my “open water diver” and specialties of diving classes. Once this realization hit me, I started applying many of the concepts of diving to AP physics 2. Many of the demonstrations and discovery activities I use in the classroom where inspired by diving. For example, my students calculate the amount of air required to generate buoyant force to lift things off the floor, they calculate the volume of a sealed bottle at different depths, and the students develop ideas about air consumption at depths. Because of this, all summer I have been trying to develop labs where students can go on a field trip to the Dive Shop to test and discover these principles. I want the students to learn from real life action in the pool. I want the students to model the phenomena and discover and explain what is happening.
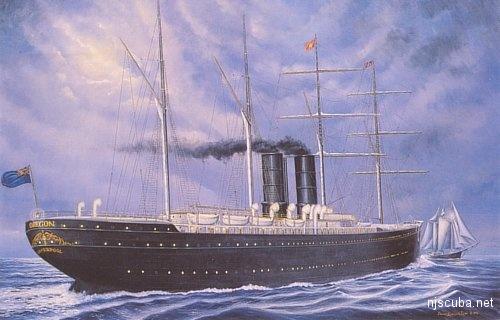
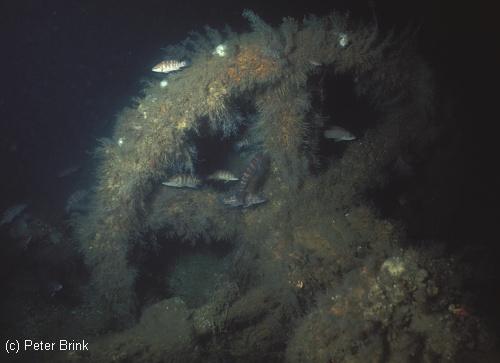
Educators should explore their curiosity and try something new. Find a dive shop and experience what you teach. The more you experience the better you will become as an educator. For example last year I dove the Oregon wreck. On March 14, 1886, the Oregon collided with another ship and sank to the bottom of around 100-foot depth just off the coast of Fire Island. She was the fastest ship of her day using sails and steam engine. Before the dive, I was told that all that was left was a three story high steam engine and boilers. I did not think there would be much to see. During my plunge into the Atlantic, the steam engine came into sight in all of her majesty. Then I spent the next 3o minutes or so lost in all of the biology and wonders hidden in all of the nooks and crannies. I was getting lost in the science and thinking of the history and people who were on that ship that fateful day.
Another dive was of the USS San Diego. On July 19, 1918, the Sand Diego was sunk by German Submarine U- 156 just south of Fire Island and was the only major ship lost during WW1. She sits upside down on a sandy bottom at about 100-foot depth. The dive was awesome and visibility was about 40 feet. This ship has been underwater for about a 100 years and my curiosity got the best of me once again. The holes that Mother Nature put in her gave me great areas to look inside and see the life of that now calls her home.
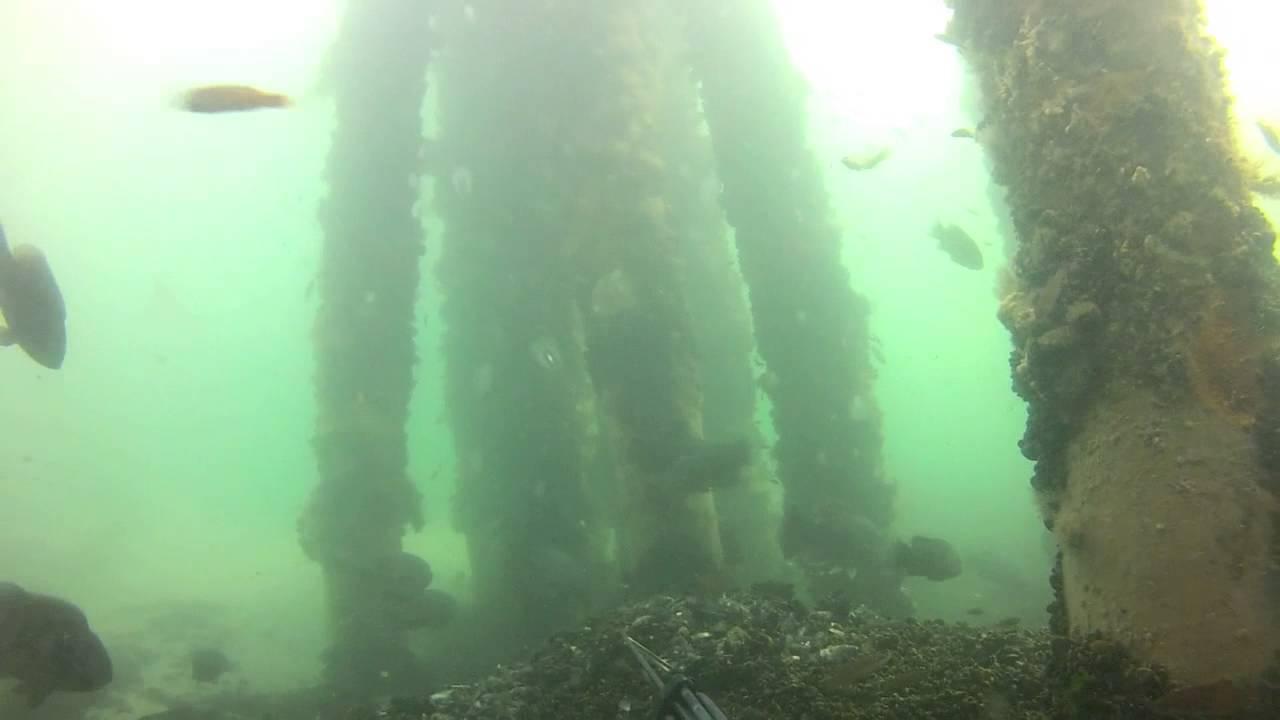
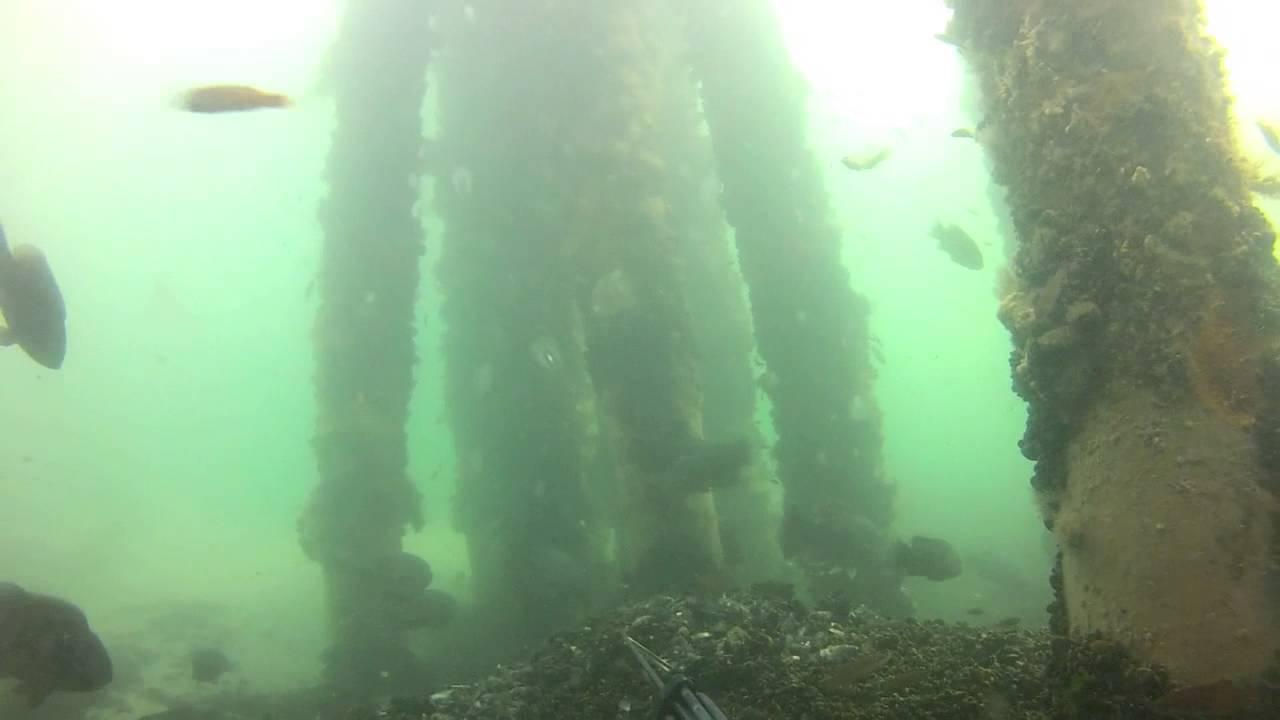
Wrecks are not the only things to see locally when diving. The Ponqugue Bridge provides a beach dive that offers so much ecology and goes a max of 30-foot depth. Right at Shinnecock inlet, you can spend 40 minutes underwater and your wonder and amazement will grow. Just to see how all of the creatures interact and how they hide and even the human impact of the environment and the symbiotic relationship that exist between humans and sea life. The two bridges offer a home to the sea life. They are attracted there for the food source and protection they offer. Including the utility cable that lies on the floor of the canal. You will find more and more hiding places for sea life. The more I dive the site the more I find.
Some of the fun is investigating the areas that you are going to explore. There is so much history just sitting there on the sea floor. I try to learn about the history before I dive the location. I do this to pre plan my activity for safety, but also to learn where a ship had been, what people were on that ship and how that ship came to meet the sea floor. If I did not dive our local stores I would never know of the German Submarines, artificial reefs and other ships that went down for various reasons. It is so interesting to learn about the history and to compare the original diagrams of the ship to what they look like now.
What I am trying to say is that it’s great to venture out of the classroom not just in field trips but rejuvenate our love of the subject. Try something new each summer vacation to get out of your comfort zone to feel more alive. The more you learn and experience and the more ways you will have to provide the information to the students. For more information please email me and if you have any ideas for labs you would like to see developed. Also if you would like to set up an experience or get your certification please let me know.
Participants would be able to choose their workshop preferences while they register, on a first-come, first-served basis. Please note that the online registration is not currently supported by mobile devices.
Option B: Registration by Purchase Order
School districts are encouraged to call Hofstra University in order to discuss the purchase order process (516-463-5750). The registration form below (Form A) must be used by each participant on the purchase order in order to provide workshop preferences and must be included when the purchase order is submitted to Hofstra. All purchase orders and workshop registration forms must be faxed together to 516-463-6006. Again, workshop registration preferences will be entertained on a first-come, first-served basis.
Option C: Registration by Phone
Individual participants that would like to register by phone can call Hofstra University (516-463-5750). Registrants would email or fax the registration form below (Form B) after registering over the telephone.
Science education in NYS is changing, so is the annual State Conference in Rochester!
Come join us November 4th through November 6th, as we roll out workshops focused on the transition to the new New York State Science Learning Standards (NYSSLS). In addition to these several workshops, the Directors-at-Large have collaborated with Subject Area Representatives (SARs) from each section from all over the state to develop half-day institutes that will immerse participants in three-dimensional style teaching and learning.
One noted change that you may observe as you register is the openness of the registration process. Besides the half-day institutes, breakfasts/luncheons, and the Paul Andersen Monday Institute, all workshops will be open enrollment for you to pick and choose your sessions using the official conference app. You must formally register for the three special events (institutes, Paul Andersen, and breakfasts/luncheons), but let your feet guide you to whichever other workshops you may be interested in. For example, if you are inspired by the Chemistry Institute Saturday morning and would like to learn more about chemistry phenomena, you are now free to change your entire conference schedule to find workshops that would meet this new need. You are no longer locked in to particular workshops, so the possibilities are endless!
Please be sure to visit the conference website to view the workshops. The conference app will be pushed out to registrants in early October to start building your custom schedule!
Many of the tried and true events are still happening, like the Wards Giveaway and the Wine and Cheese Reception, so come join us for three days of fun (and a little bit of learning too)!
Here are a couple of databanks of NGSS-related phenomena that teachers from various regions of the country have put together. If you find some more, feel free to include those links in the comment section!
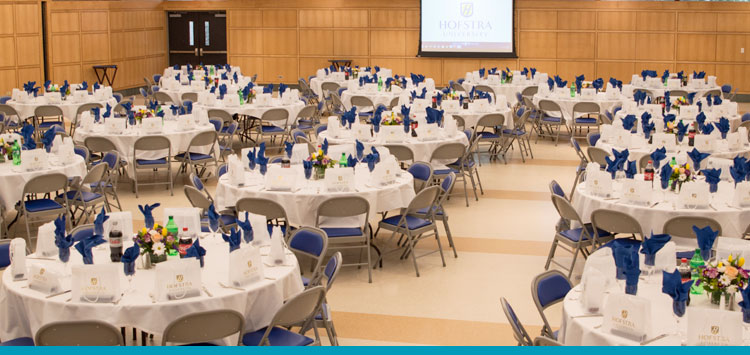
The Suffolk Section of STANYS, in partnership with Hofstra University, is proud to announce that the STANYS Fall Regional Conference will be held at the Mack Student Center on Monday, October 16th! Morning registration starts at 7:30am, and the cost of the day is only $65!
Our distinguished keynote presenter will be Professor Joseph Krajcik, the Lead NGSS Writer for Physical Science and Director for the CREATE for STEM Institute at Michigan State University. Since the publication of the Next Generation Science Standards, Professor Krajcik has played an integral role in the development of formative assessments through the Concord Consortium. You can check out the following video from the National Science Teachers Association, where Professor Krajcik discusses the vision of the NGSS.
The Framework for K-12 Science Education and the Next Generation of Science Standards challenges the science education community to support students in developing deeper, useable knowledge to make sense of phenomena or solve problems. This will only occur when students make use of the three dimensions – disciplinary core ideas, scientific and engineering practices and crosscutting concepts. The Framework and the NGSS refer to this as 3-dimensional learning. Three-dimensional learning shifts the focus of science classrooms from environments where students learn about science ideas to places where students do science by exploring, examining and using science ideas to explain how and why phenomena occur and designing solutions to problems. Doing science to learn science helps students form useable knowledge to explain phenomena and make sense of problems. In this session, Professor Krajcik will provide an overview of each of the dimensions and show how they work together to enable students to explain phenomena or design solution to problems. Woven throughout his remarks, he will discuss the opportunities and challenges of engaging learners in three-dimensional learning.
After the keynote address, participants will be able to choose workshops in three separate sessions, with a provided lunch in between. We will be offering two unique double session workshops, where attendees can choose to attend Professor Emily Kang’s workshop on Implementing the NYSSLS/NGSS or to participate in an authentic modeling scenario with Donghong Sun from STEMteachersNYC. Representatives from the Right Question Institute will also be offering two sessions on the Question Formulation Technique, which is one method that STEM teachers could develop students’ ability to ask their own questions.
Besides the double sessions, teachers can also choose from a variety of other workshops from Long Island teachers and college professors focused on improving science education for all students! To check out the full list of workshops, please click here. The link for registration will be active soon for payment by credit card. District purchase orders will also be accepted. Please check back by September 8th for more information on registration!
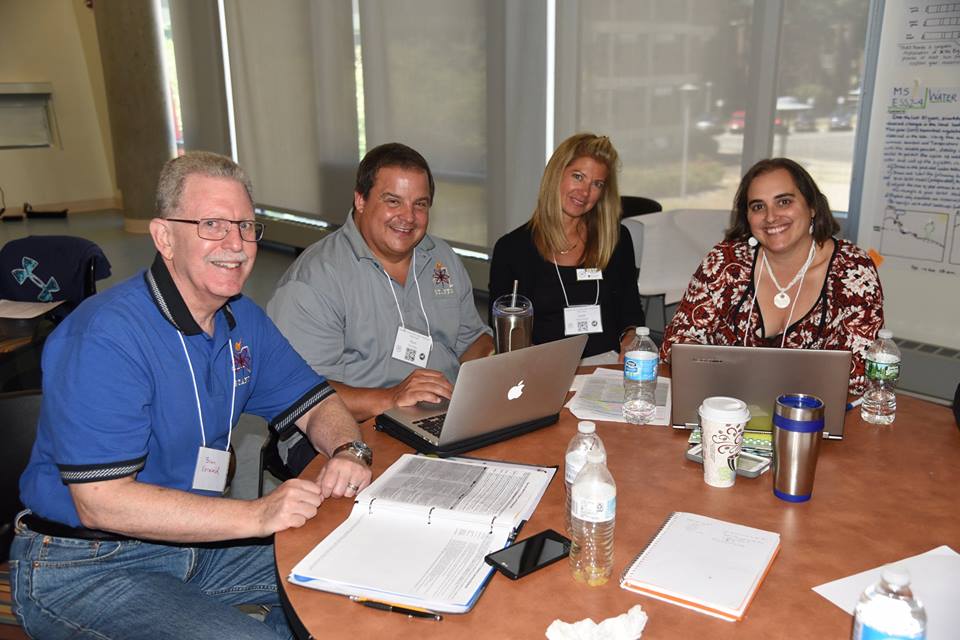
This past week, STANYS and the New York State Master Teacher Program co-sponsored professional development workshops in three regions in New York State. The first of its kind model, allowed for teachers from across the state to experience the same two-day workshop. The consistency of the professional development was helpful as New York teachers came together to start to build a collection of lessons and ideas using a common understanding and template. Key to any professional development is the quality of the presenter. Luckily, for New York, Paul Andersen, who has created countless videos on the Next Generation Science Standards (NGSS) and has led teacher training sessions all over the world was on hand to provide a deeper dive into New York State Science Learning Standards (NYSSLS).
The workshop began with “The Wonder Tube”. During this exercise, teachers wore their “student hats” to experience firsthand modeling instruction from the other side of the desk. Teachers were provided with a demonstration of the Wonder Tube and individually developed a model for what they perceived to be the mechanism by the which the tube functioned. Key to utilizing phenomena such as this is that students are not able to google the answer and find out how it works. Participants individually drew what they believed the model to be, followed by group questioning of each individual’s model to understand what that person was thinking when they made that model. Teachers had a hard time with this task, wanting to state what they thought was happening. The pedagogical shift calls for group members to come to a consensus through the constant questioning of individual group members regarding their model, with no one group member simply telling “the answer”. Models were presented, and the audience was given the opportunity to ask questions. Amazingly, no two models were the same. Paul asked the entire group to find similarities and differences within the models. Modeling instruction is one vehicle by which teachers can begin to incorporate science practices into our classrooms. For more support with modeling, the American Modeling Teachers Association runs workshops to assist teachers.
Another teaching tool introduced by Paul called Question Formulation Technique calls for students to generate a list of questions surrounding an observable event; a phenomena. To do this participants observed termites following black lines that created the pattern of Olympic rings. Participants then brainstormed as many questions they could about the regarding the behavior of the termites they had just witnessed for five minutes. This was followed by labeling the questions as open or closed and determining which open ended question the group should investigate. The technique is easily applicable to teachers who would would like to try a NYSSLS aligned student driven inquiry approach.
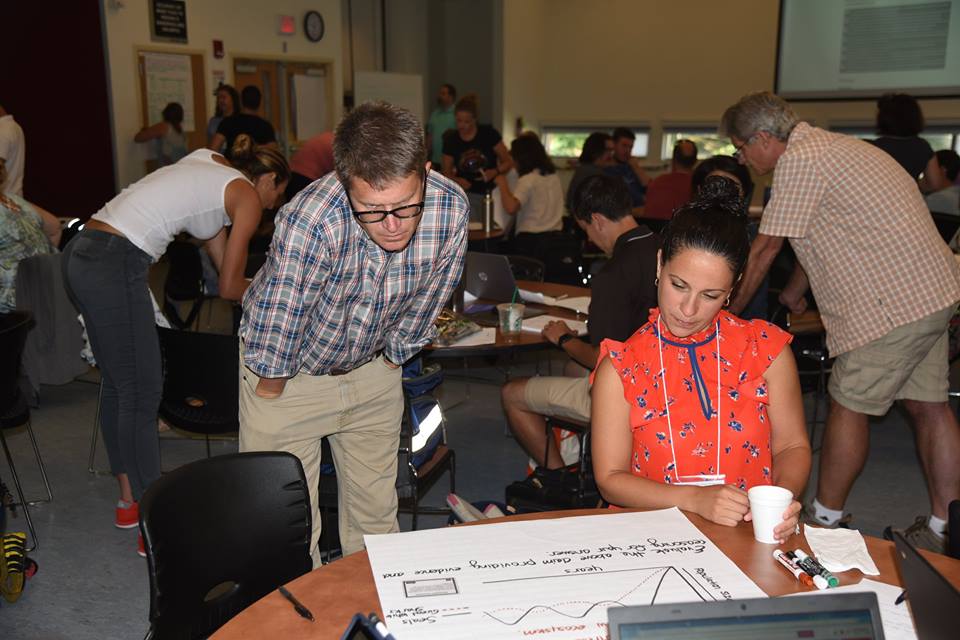
Another means of rolling out NYSSLS to the participants was the Claim, Evidence, Reasoning (CER) framework, which focuses on the conclusion component of a laboratory report. After the students have completed the experiment, in essence collected their evidence, they are ready to make a claim. The teachers had the opportunity to experience this framework by investigating the question: “Are skew dice fair?” Groups then created large posters with their claim as well as a display of the supporting evidence via words, tables and graphs, followed by the reasoning which included scientific principles surrounding the experiment. Posters were stuck to the wall and shared with others through a gallery walk and critique with post-its by other groups. Paul also provided his inquiry lab format as a resource to assist teachers in NYSSLS implementation via CER. This starts with an explanatory model, students then sort the variables in order of importance, after which comes data collection, a graphical representation and then the exercise concludes with the CER framework.
When starting the workshop, Paul asked for what the teachers wanted to get out of the professional development and on the second day, he came back to address the topics that were of greatest interest to the attendees. One such NYSSLS concern was how to incorporate engineering design in your classroom by first defining criteria, followed by developing a solution and then refinement of that solution. Anderson suggested an activity that gave the participants the task to make a tower as tall as possible with only two pieces of computer paper, 10 cm of tape and five minutes. All participants were engaged as the clock displayed in the front of the room counted down the time. All groups frantically rushed and at the end Paul claimed that was just the prototype and now participants were given the same task after observing what other groups had done to engineer the actual tallest tower. The activity could be utilized in any STEM classroom and adapted to a variety of tasks.
Teachers are eager to learn about what assessments will look like with the new standards. There are a variety of resources available to help teachers get started. Paul recommends starting by printing out cards with practices and crosscutting concepts to help generate ideas for student assessments. On the second day of the workshop, teachers of the same content area worked to create an assessment aligned to one specific performance expectation. By laying out the cards on the table, teachers were able to unpack the the practices and cross-cutting idea that could be used to assess the particular disciplinary core idea. Large posters of assessments were created and hung on the walls. Groups then gallery walked and gave feedback with post-its to improve the questions which were photographed and collected in a google drive to serve as a resource as teachers present go out and turn-key aspects to their colleagues. For additional resources on assessments, Paul suggested looking into ngss.nsta.org and nextgenscienceassessment.org for NGSS bundles and storylines for example assessments.
If one thinks of the level of comfort of the new standards, there is still much growth for all parties involved. Paul discussed how the implementation of any new teaching methodologies have an initial dip prior to rise is success rate and the same should be expected as teachers start to incorporate the NYSSLS approach. The workshop concluded with groups of the same discipline creating lessons using a common template.
Are you interested in diving even deeper? Then consider joining your fellow STANYS members at our state conference this November 4th- 6th in Rochester, where teachers will have the opportunity to learn more through a more extended content specific teacher institutes. Additionally, on the Monday of the conference, Paul Andersen is slotted to provide further workshops on NYSSLS. If you are unable to travel to Rochester please consider attending the Suffolk STANYS Fall Conference, which will be held on October 16th at Hofstra University where there will be more opportunities to learn about some of the NGSS best practices through modeling and questioning workshops.
Attendees work together to create NYSSLS assessments.More attendees having an (obvious) good time!Teachers utilize Paul’s cards for science practices and crosscutting concepts to design assessments.Paul provides feedback on teacher created assessments.
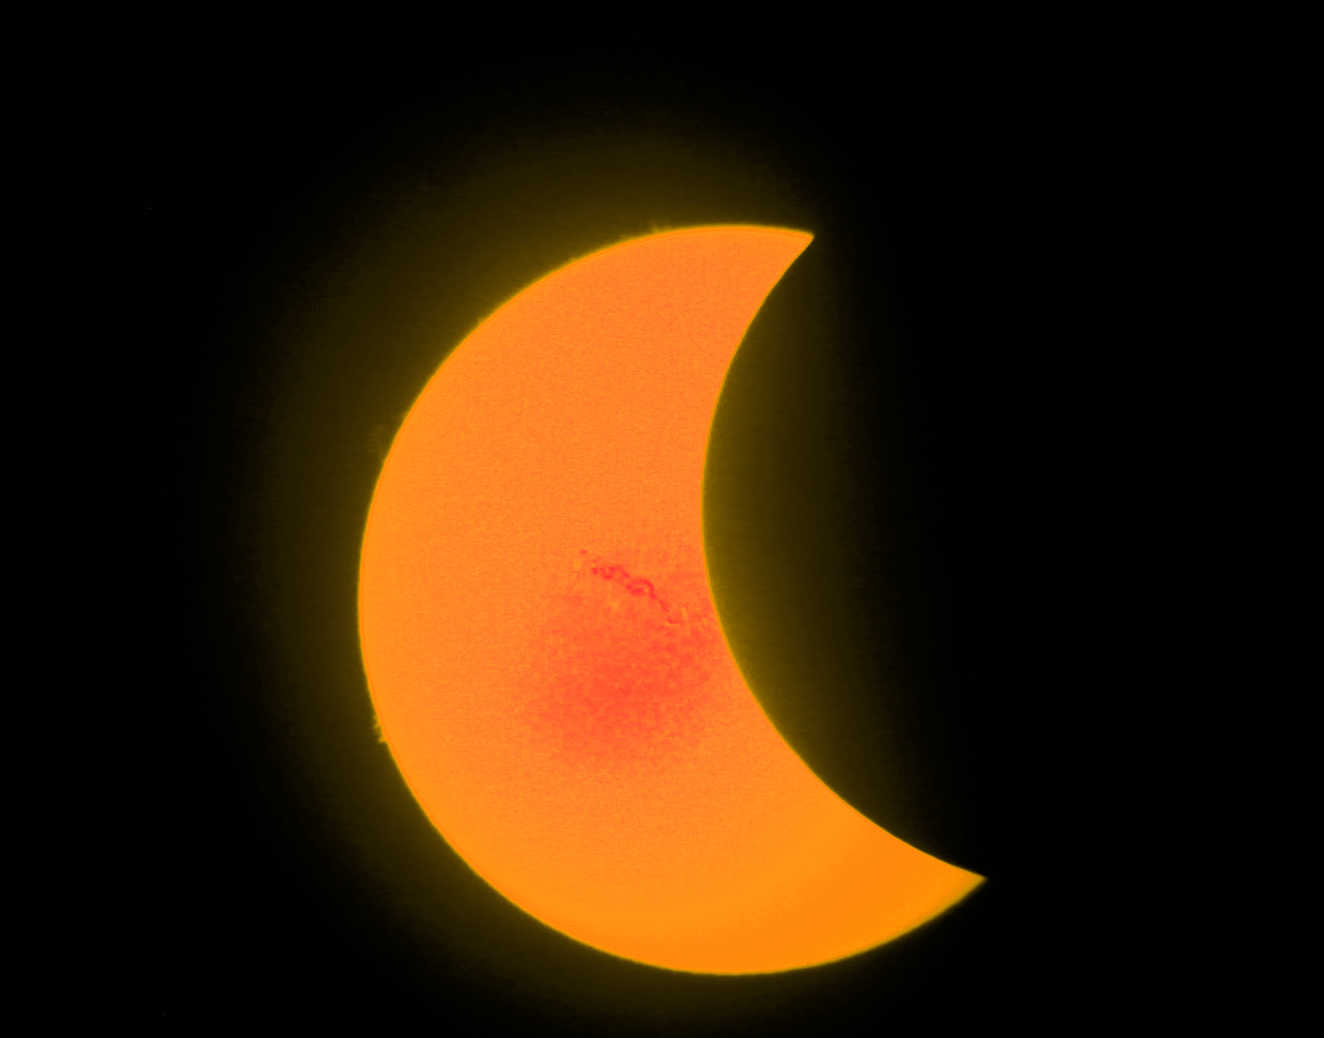
An image of the 8.21.17 eclipse, taken by the author of this post.
The smartphone operating system will dictate which apps you use. However, many of the apps are similar, so they can be used the same way. Having the students load a sky map of some sort, will allow most of the kids not to get bored if you do an observing session at night with limited telescopes. Better yet, include an app that detects the position of the International Space Station, and plan an observing night that coincides with a flyby of the ISS. Students and parents always marvel at the sight of it as it brightly passes overhead. Passing Iridium satellites can also be predicted and observed.
If I’m teaching astronomy, I always ask the students to load a program onto their laptops, it’s called Stellarium. Stellarium allows students to see their sky at night, for that date and time (or any date and time), and illustrate it many ways. It also shows other cultural constellations, not just western culture. Stellarium can be used for H.W. Assignments, teaching constellations, mythology, teaching star circles, and learning about deep space object classification systems. Another laptop program that’s free and is a great tool for showing our place in the universe is Where is M13? It is a program that maps out our galaxy, and most of the visible celestial objects in deep space that you might discuss. It is also useful for showing the structure of our galaxy.
Now telescopes, if you are considering purchasing equipment the first thing you should buy is a solar telescope. Meade is producing a low-cost solar telescope called the PST. If you are new to solar observing, you can easily see sunspots, prominences, and solar flares with these solar telescopes during the day! For night, skip the refractors, because good ones are a fortune, and cheap ones are good for the moon only. A planet will look like a small dot, and the planet will rotate away before a student has a chance to see. At night, diameter counts, and the cheapest way to get diameter is with reflecting or Newtonian style telescopes. A 10” or 12” reflecting telescope will not break the budget and is not too heavy to move. If you get an equivalent catadioptric, it’s a back breaker and very expensive. Used equipment can be found online, so if your district is willing to but that way, you can save money by shopping on Cloudy Nights.com. Trussed reflectors are a little cheaper than catadioptric but more expensive than Dobsonians (Newtonian version), however, they are easy to set up and are light. OK, you keep hearing me mention catadioptric. I’ll save this one for last, as they are expensive. I just saw new 9.25-inch listing for $3000.00. That is a starting point, they get more expensive. They are also heavy and delicate. The advantage is that most catadioptric are compact in length, are GoTO, and most have a GPS to do self-alignment. Having a big heavy mount is important for these instruments, otherwise they will vibrate and so will your object in the eyepiece will too.
Just a few more tricks, I use Google Earth and a solar system scaling Excel program (Google it) to create a scale model of the solar system if the sun has a 9” diameter. I usually will have the class on the athletic field to build the model. I like using solar system and constellation flash cards during lessons as a quick segue into lessons. Most of my students love Scale of the Universe, and I as a teacher love UNL Astronomy Simulations. Well, that’s it for now, enjoy the rest of the summer and don’t forget the August 21st solar eclipse!
STANYS’s Annual Conference held in Rochester spans three days with workshop opportunities over ten sessions, keynote speakers, exhibits, and field trips. The 122nd STANYS Annual Conference, November 4-6, 2017, will be the best place in New York State to find out what is going on in science education. The focus of the Conference will be on Science – Now in 3-D (Three Dimensional Learning) as teachers begin to prepare for the NYS Education Department’s implementation of the NYSSLS. What better place to learn about this new constructivist approach!
At the Annual Conference’s Exhibit you will have an opportunity to meet with company representatives and learn about their company’s:
Advancement of scientific products / technologies aligned with the NYSSLS
Impact on the environment
Educational programs/activities for K-12 science teachers and or students
Scholarships for high school to attend summer science workshops / research programs
We hope you will make every effort to attend this year’s Conference so you will be able to share the information you acquire with you colleagues.
Systems thinking is as important as it is hard. As we look at the New York State Science Learning Standards, we see a clear role for systems thinking. Systems and System Processes is one of the Cross-Cutting Concepts, and Developing and Using Models is a Science Practice. It should be obvious to all of us that where we are going as a state is very much to system-land.
There are many ways that we can model system dynamics. Many of us model systems in our classrooms whenever we engage in “simulations”, or other types of modeling activities. And I’m sure most readers are well aware of the various interactive computational simulations that have been created for students to work with. But there are not a whole lot of computational resources that allow students to construct relatively robust models of systems for their own investigation. This is mostly because programming computers is relatively difficult. As such it’s not often tenable to train students in how to create a computational tool prior to having them use it.
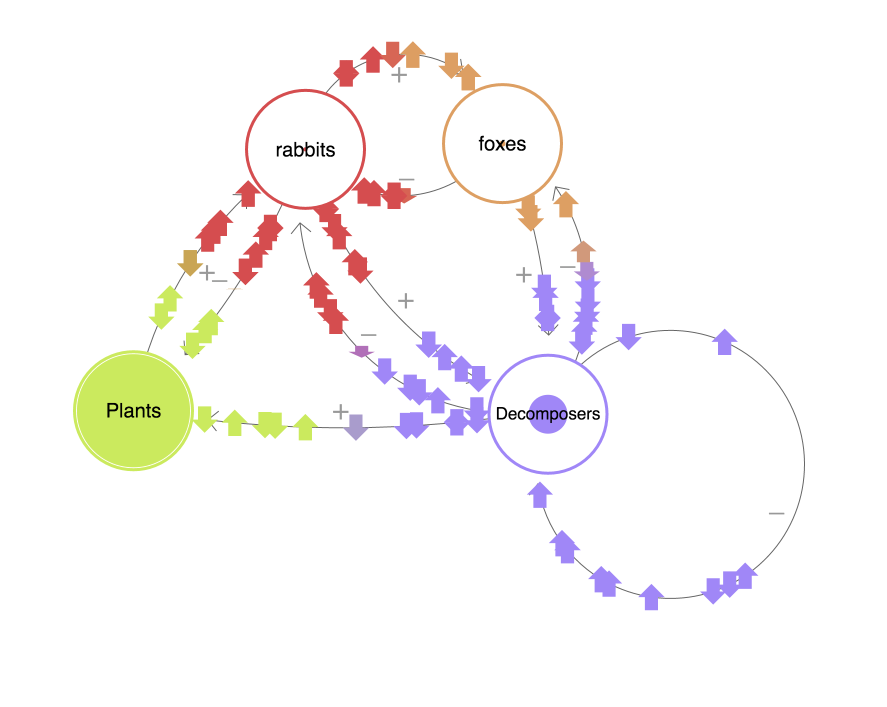
Here’s an example of Loopy at work in a simple food web model that I created for this article:
See? Not that hard (also, I totally understand that it’s “not that good”).
Tools like Loopy can help give students opportunities to model systems, without the high cost of entry that usually accompanies computational model construction.